Step 1- The first thing you'll need to do is open up ZBrush. Under the light box tools that appear select the human being that has already been created within ZBrush.
Once this character is loaded go over to the tools menu and pick the sub tools menu.
Since we do not need the clothes or the pre-painted textures, go ahead and click the eye symbol for everything from below the teeth and turn off the paint brush symbol from the top to the bottom and your character should now look like the one seen below.
Next we will need to take the subdivisions back down some. Go and click on the torso in the sub tools menu.
Then open up geometry and take the subdivision levels back down to 3 and then delete the higher and the lower subdivision levels.
Doing this will make the model much easier to work with. We need to create a scale, that's right just one scale to get this to work. First we have to save this model first so go to the top right corner of the tools section and slick save as and save it as "Guy.ztl." After you are finished with that start a new project in ZBrush.
Step 2- Next we are going to create a scale to be used as the Nano-Mesh. First select a Dynamesh sphere 64 from the light box menu.
Then by pressing X o turn on symmetry and then B to bring up your brush menu. Then press M and select the move tool. Begin to shape and form your scale until it looks similar to the one below.
Once you are satisfied with your scale it is time to save it out as a ztl file. Go to save as and then save as "Scale.ztl."
Once that is complete it is time to go back to your human figure.
Step 3- Click the load tool button up in tools menu and then load you "Guy.ztl." from your computer.
Drag him onto the screen and hit T for edit. open up the sub tool menu and select the torso or the top piece of the model.
Once you have completed that press the B button to open up the brush menu and press Z and then select the ZModeler brush.
Next you are going to turn on your poly frame button.
You should now see your model's poly groups with various colors of separation.
For now we will only focus on the torso region of the body.
Step 4- Next we will begin setting up the Nano-Mesh process. First hover over a polygon on your model and press the space bar and it should bring up the ZModeler menu. You will then click Insert Nano_Mesh in the action box and then click flat island in the target box.
Doing this will allow for the mesh to cover more area repeatedly across he model.
Step 5- Lastly we will insert the scale mesh onto the surface of the torso. Press the M button on your key board and select the Scale.ztl. that you created.
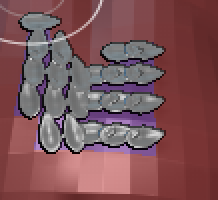
Now click and drag out and you will see your scales drag out evenly across a certain area of the torso. As you can see they did not drag out the way that we wanted them but there is an easy fix for that as well.
Go over to the tools menu and select the Nano-Mesh tab. Inside here we can change the size, shape, positioning, offset, and much more to get are scales to the way we like them.
After making some adjustments and playing around with the settings, you can see that we can get very interesting shapes, sizes and placements of our scales to make for interesting patterns that would continue across the character as a whole.
This was just one of many ways that Nano-Meshes can be utilized and below are some more images of ways in which Nano-Mesh can be used to heighten the look of your models.
As you can see Nano-Mesh is a great tool to use and have in your skill set to not only save on time but to add a little extra to your models. The possibilities with Nano-Mesh is as endless as your imagination and will only enhance your capabilities and your understanding in ZBrush. If you would like to know more about Nano-Mesh inside of Zbrush visit: http://pixologic.com/zbrush/features/instances-and-details/#NanoMesh
Resources
Pixologic :: Pixologic :: ZBrush 4R7. (n.d.). Retrieved May 23, 2016, from http://pixologic.com/zbrush/features/instances-and-details/#NanoMesh


ReplyDeleteKeep up the good writing.
wincracker.com
Pixologic Zbrush Crack